Double- and single- hung windows are held open by “window balances”, also known as “sash supports”. When a sash support is not functioning properly, your window will not stay open—when opened, it’ll just fall back to the closed position. This can happen to older windows, as the tension of the sash support is reduced by the opening and the closing on the window after a long period of time. This can be bothersome to people who enjoy fresh air in their home, especially during the summer months. It can also be dangerous, as fingers could get crushed by the unexpected falling of the window. Instead of replacing the full window, which can get expensive, you can replace just the window balance. Replacing a window balance can be done relatively quickly and easily.
Replacing the Sash Support/Window Balance
Your window may not be staying open because of a malfunctioning sash support. There are two different kinds of sash supports—channel and tube. Both channel and tube window balances require different replacement techniques, but both can be done by a novice in about an hour.

Tube Spiral Window Balance Replacement
- Begin by unlocking your window and raising the sash 6 to 8 inches. Next, you’ll begin tilting out the sash to gain access to the slide where the bottom of the balance attaches.
- Release the sash by lifting up one side of it towards the ceiling.
- Unscrew or unsnap the sash stops from the window frame. You will now have access to the spiral window balance.
- On the bottom sash, remove the top screw in the top corner of the jamb, meanwhile holding the tube in place. These screws can be difficult to remove, and if they won’t move, try wedging a pry-bar behind the tube to try and pry the screws out.
- Next, you’ll remove the support bracket. You’ll do this by removing the one or two screws that hold this bracket in place. Be careful when removing these screws, because the spiral balances will spin because of the tension they are under.
- Now that you have removed your broken spiral window balance, it’s time to install the replacement. Though this replacement can be done by one person, it’s helpful to have someone hold the sash in place while you’re working. If no one is available to help you, use a block of wood to hold up the sash.
- Set the sash in place. Do this by setting the top sash in its track and let it rest on the sill. Do this for the bottom sash as well.
- Repeat the next steps for both balances on each side of the sash. Drop the balance with the bracket end first into the mortise on the side of the sash. It will slide all the way down to rest on the sill while you hold the top of the tube above the sash.
- Attach the tube by pulling it all the way up to the top of the jamb letting the spiral fall into the sash mortise. Attach the tub with a 1 ½-inch wood screw.
- Grasp the bracket and spin it clockwise to add tension to the balance. Turn it until the bracket is almost at the bottom of the tube and pull it down about 6-8 inches and turn it until it makes it way back to the tube again.
- Get a 1-inch wood screw to attach the bracket onto the bottom of the sash. Attach two screws if your bracket accepts two screws.
- Test it by putting the window in different positions to make sure the tension is right. Tension can always be adjusted if needed.
- Once you put the stops back on, your spiral window balance installation has been completed.
Channel Window Balance Replacement
You have now completed your DIY home window repair! DIY projects don’t only save money, they can give you useful skills as well. Now, give yourself a pat on the back and enjoy your new-and-improved window.
Contact us at Home Window Repair if you have any questions about your sash support replacement.
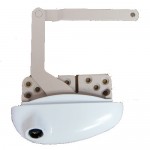
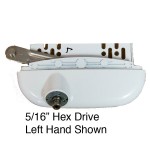
]]>We are now stocking assorted Roto Window Operators. We currently have the a Roto Sash Lock, and two of there operators, a Pro Drive and X Drive Model. The Sash Lock measures 4-3/4″ tall by 3/4″ wide with a hole spacing of 3-15/16″. The lifting arm projects out 1-1/8″ with the cut out measuring 11/16″ deep. The Pro Drive Split Arm Operator has a housing that is 4-1/2″ wide and the linkage arm is 4-3/8″ long with the mounting post projecting downward. The X Drive model has hole spacing of 3-1/2″ on center on the outside holes with a 1-7/8″ hole spacing on center for the inside holes. This operator is connected to the handle with a 5/16″ hex shaft and the pin on the arm has a 1/4″ diameter.
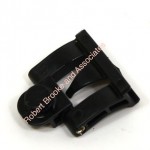
]]>Over the past few months we have been seeing a lot of calls on a Truth Window Hardware part marked 31878. We can confirm that that part is our part number Wi11647, the Truth Maxim Slide Shoe 11647. This piece is the part that attaches to the Truth Maxim and Truth Encore Awning Operators. The Slide Shoe attaches to the arm of the operator and is held in place by the 31879 Truth Maxim Detach Clip. The Slide Shoe slides in the Track that is attached to the sash. An Awning window is a window that swings like a one piece garage door, not to be confused by a Casement window that swings like a door.
]]>The Truth Entrygard operators are shipped with the arms in the wrong position, especially the linkage arm. The easiest way to switch this over is to hold the base and the long arm in one place and crank the crank handle over and the linkage arm will fall into place. The other easy way to do it is to put the operator into your window, screw it down, and hold the long arm while you screw the crank handle around and it will go over to the correct position.
]]>We just posted the video below to help clarify the difference between offset up and offset down linkage arms.
Truth Entrygard Offset Up and Down Linkage Arms:
One of the more popular questions we are asked is, “ what is the difference between offset up and offset down”. In the first diagram we are seeing an offset up linkage arm, which is generally the more popular arm. In this diagram we see an offset down linkage arm. Hopefully this has answered our question on the Truth Entrygard Offset Up and Down Linkage Arms.
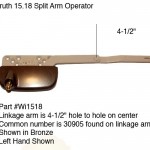
]]>The numbers 45035, 40351 and 40352 are stampings on our 30905 operator, or more specifically our Truth Split Arm Operator 30905. These numbers are just stamping numbers, but they help us make an educated guess that you have the Truth Split Arm Operator 30905. We find the number 45035 cast into the crank gear box housing. We find the number 40351 on the right hand arm, and 40352 on the left hand arm. The number 30905 we find on the linkage arm which connects to the window or sash through a bracket. The linkage arm measures 4-1/2″ from rivet to the center of the hole, and measures 5″ overall length. The linkage arm offsets upward. This window crank can be found on our window website @ https://www.homewindowrepair.com/truth-split-arm-operator-30905.html
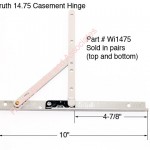
]]>Is your Truth window hinge stamped 31230, 40887, 40941 and 40942? If so you can replace it with our part # Wi1475, the Truth Casement Hinge 14.75 – 30744. We sell our casement window hinges in pairs, meaning you get a top and a bottom hinge. If you have the opposite hand window, then the bottom hinge goes to the top and the top goes to the bottom to change the hand of the hinge. As long as you replace the top and the bottom hinges, this hinge will work as a replacement. The reason we would like you to change both hinges, is we want the same rate of rotation at the top of the window as we have on the bottom. Over the years Truth has changed there hinges, and we do not want any binding of the window. Below we show and image of the Truth 30744 window hinge.
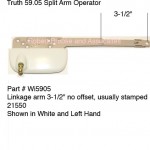
]]>If you have a Wright Products window operator with the number 07900 stamped on the linkage arm then our Truth Window Operator 59.05 will work as a replacement. The lead arm and the linkage arm are the same size, but there are two glaring differences. The first difference is the position of the linkage arm. On the Truth Window Operator 59.05 the linkage arm is mounted on the bottom of the lead arm. To correct this difference you might have to move the stud bracket down, or swap out a left hand for a right hand stud bracket and mount the bracket upside down. The other difference is the housing. In 2012, Truth discontinued the Traditional housing and went to the Ellipse housing which is more rounded. To get around this issue, you might have file the operator cut out so the opening is a little larger. The Ellipse housing is about an 1/16″ thicker were it would come threw the window frame. Both of these issues are easily corrected. The Replacement Operator is our part number Wi5905, and can be found on our Truth Window Operator 59.05 Split Arm Operator web page. Below is an image of the Wright Products 07900 window operator replacement.
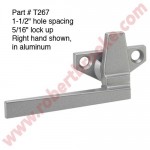
]]>The Truth window handle number 45086 and 45085 could be one of 3 or 4 window handles. The number 45086 and 45085 are casting numbers that help us narrow it down as to what you have. One of the handles is our T267, or the Truth 25.29 Two Hole Cam Handle. Another popular one is the T268, or the Truth 25.31 Two Hole Cam Handle. The differences in all of the handles cast with the numbers 45085 and 45086 is the mounting base. Both of these handles are surface mounted and are constructed of a die cast metal that is then powder coat painted to your selected color. If you are still unsure, you can email me a picture @ sales@robertbrooke.com or call us 1-800-642-2403.
]]>Many of our calls are from homeowners looking to fix there so and so brand casement windows. Weathershield is one of those brands that we run into. Weathershield Casement Windows usually use Truth Window Hardware, and more specifically, we usual see the Truth Split Arm Operator 30905. The best way to determine which operator you have is look at the arms that attach the window operator to the window. With these numbers you can enter them into the “search entire store here” on our website, Residential and Commercial Window Parts. The numbers that are the most help are the 5 digit numbers that start with a 2 or 3.
]]>